
Live Chat!
SVX or Subaru Links
Old Lockers
Photo Post
How-To Documents
Message Archive
SVX Shop Search
|
SVX Network Forums Live Chat! SVX or Subaru Links Old Lockers Photo Post How-To Documents Message Archive SVX Shop Search |
IRC users: |
|
#1
 11-02-2005, 01:59 PM
|
|||
|
|||
|
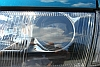
Pre existing condensation in lights
I found out how to prevent it, but how to I get the condensation thats in there already out? I really dont want to break my lights !
I have a spare center light in my house I took off a week ago and it still has condensation in it 

|
|
#3
11-02-2005, 03:52 PM
|
||||
|
||||
|
Ues your oven.
Seriously, I have done this for both my tail lights and center section. Believe it or not, the whole center section will fit into a standard oven. Set the oven about 170-180 degrees and put the pieces in. check them about every 10 minutes or so.. You will see the moisture evaporate. When all the moisture is gone (usually in about half an hour), remove them carefully as they are quite hot, and move them to a counter or somewhere to cool completely. .
__________________
. Subaru Ambassador 1996 Polo Green LSi #216..138,100 miles...SOLD JFICX8659TH100216.....Date of Manufacture: November 16, 1995..... Fuji Heavy Industries..Ōta North Plant....Ōta City,. Gunma Prefecture, Japan In-Service Date: January 2, 1997 "The Pristine Green Polo Machine First Polo Green on the Network First Clear front turn signals, JDM Alcyone hood emblem, rear panel, and BOXER engine cover on the Network (US) (2000) First 5000K HID factory fog lights (2007) First SVX JDM BBS wheels on a USDM SVX (2013) HID lighting (5000K) for headlight and H3 fog lights, PIAA SuperExtreme 120W high beams, rebuilt EG33 longblock, Cometic head gaskets, Phase II flexplate, AMR aluminum radiator with custom silicone hoses, 160A high-output alternator in aluminum-ceramic coated case, new design alternator wiring upgrade v.4, rare factory headlight protectors, refinished JDM BBS mesh aluminum wheels and custom, polished billet aluminum new hex center caps, LED grille mod, R1 Concepts high-carbon cryo slotted rotors, Akebono ceramic pads, Goodridge S/S braided brake lines, Smallcar Stage 1 shift kit, ThermalTech aluminum/ceramic-coated valve covers, Energy Suspension urethane front & rear swaybar bushings, Bontrager22 rear swaybar with QS Components Chromoly Teflon/Kevlar endlinks, "$15.00/5 minute" suspension mod. Hella Supertone horns, Custom stainless steel exhaust system with 2" headpipes, Magnaflow cats, AeroTurbine AR25 resonator /AWD "Bullet" muffler. R.I.P. 2010 Subaru Outback Limited 2.5 CVT...338,000 miles. Totaled by a 1,300 lb. COW March 4, 2016 2014 Hyundai Avante Limited ...178,000 miles. Actually quieter and smoother than the Outback  2007 Mazda Miata MX-5 PRHT...102,000 miles. Plenty of parts, service and windshields.  4th Registered Network member 2/21/2001 My NEW locker..I...My Email..I..Wikipedia/SVX . .
|
|
#4
11-03-2005, 10:05 AM
|
||||
|
||||
|
I second that suggestion. Basically set the oven at the lowest setting and keep checking on them.
__________________
David B. SVXipedia @ SVX-IW.COM -- SVX Information Warehouse 2.0 coming...eventually! Ebony 1992 SVX LS-L 5 spd Koni/GC Stebro 187k miles RIP (Rust In Pieces) 1993 SVX 5 spd Koni/GC Stebro Polyurethane bushings still available!
|
|
#5
11-03-2005, 10:09 AM
|
|||
|
|||
|
I hope its true cause the oven is preheating
|
|
#6
11-03-2005, 10:36 AM
|
|||
|
|||
|
now its cloudy and still some condensation
|
|
#7
11-03-2005, 10:44 AM
|
||||
|
||||
|
I just put my tail lights on the rack in the dryer for like an hour and then let them sit in the house for a week. That got out most of it out. I put them back on the car and week later they were all cleared out.
__________________
2005 Legacy GT 2002 WRX VF22, Pinks, big TMIC and turbo back 128,*** miles  My WRX's Cardomain Page
|
|
#8
11-03-2005, 10:46 AM
|
|||
|
|||
|
I got them in the oven now checking every few minutes but the center light definetly is worse (it didnt fit all the way in I had the door part open)
the taillights its closed
|
|
#9
11-03-2005, 10:47 AM
|
|||
|
|||
|
I took them apart still working on resiliconing them
Last edited by pnyklr; 11-03-2005 at 12:11 PM.
|
|
#10
11-03-2005, 03:12 PM
|
|||
|
|||
|
I took apart both taillights cleaned them then siliconed them closed, siliconed the gasket to the light then siliconed the lights to the car
We'll see what happens On the other hand now I have a very cloudy spare center light !!
|
 |
|
|


 Linear Mode

