Are the headlights on your svx an unsightly hazey yellow? Chances are yes, lol. Well I've been reading everyones ideas on how to fix that and determined that none of my fellow svx'ers know how to polish. The good news is I do and in this post I will tell you how to too...along with a detailed how to on the simple process of removing the lights so you can work on them comfortably.
The entire time this method will take you to restore your entire set of lenses to factory condition is about an hour and a half, it's easy on the wallet, and takes almost no tools.
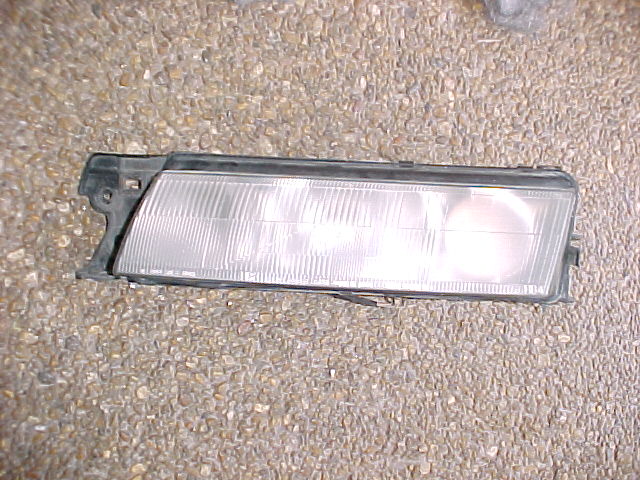
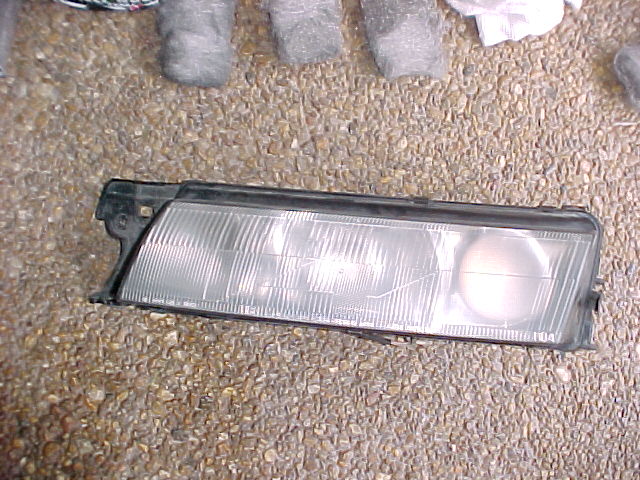
Now for some pretty pictures. I thought it would be nice to see a before and after all in one so here's a close up of the completed center lense next to the nasty headlight lense on the car.
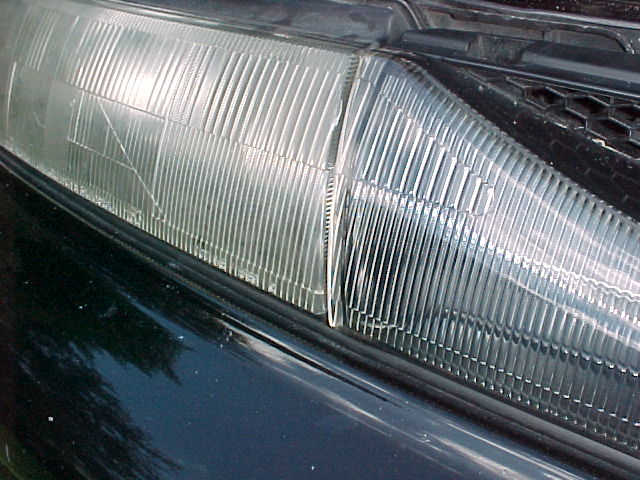
Yes that's an ugly looking yellow headlight and trust me it's even worse in real life, probably just like yours. If you're getting excited already scroll down further and you can see a picture of that same headlight lense clear, shiny, and pretty. You can also see a picture of my beautiful lsi svx with the lenses back on it

. OOOoh I love these cars.
What you will need to do this job:
1) 10mm socket with extension and ratchet
2) Philips screw driver
3) Small flat head screw driver
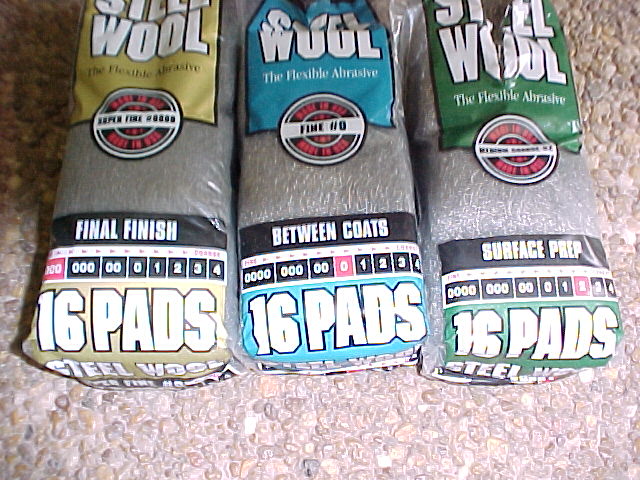
4) #2 steel wool
5) #00 steel wool
6) #0000 Steel wool
7) Meguiar's mirror glaze show car polish (7)
Any decent hardware store will have those grades of steel wool and any decent auto parts store will have the meguiars polish. More good news is you will barely use any of the polish and it's great stuff to get your svx nice and shiny before waxing.
Here's a picture of the steel wool just because:
Ready to get to work? Alright, pop your hood. Now if you look at the top edge of your car's grill you will see that there is a plastic clip on the back of each corner holding it to the radiator support. Insert your small flat head screw driver.....I said the screw driver damn it! into the center of each clip pushing the tab in the middle down as you pull that corner forward and off of the radiator support complete with the clip. After you've pulled each clip free you can pull the grill straight up and off. The only other thing holding it on are tabs on the bottom that slide straight down into a couple of same shaped slots. Here's a picture:
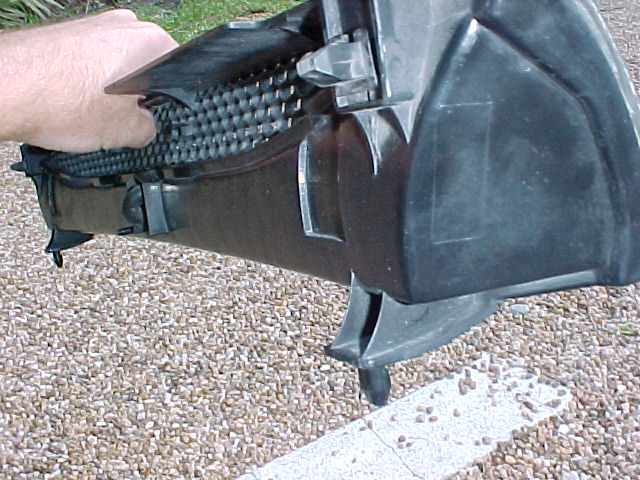
With the grill off the bolts holding the inner side of the headlights are exposed. Using your 10 mm socket and ratchet set, remove them. There are two on each headlight. Another picture....
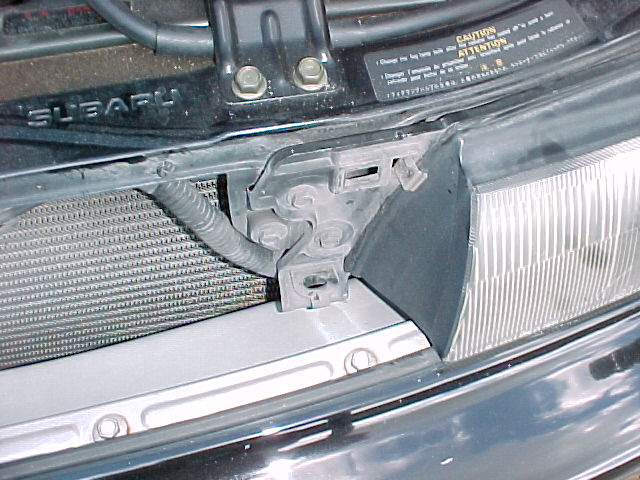
On the top outer corner of each head light is a philips screw which holds the corner light in place. remove this screw.
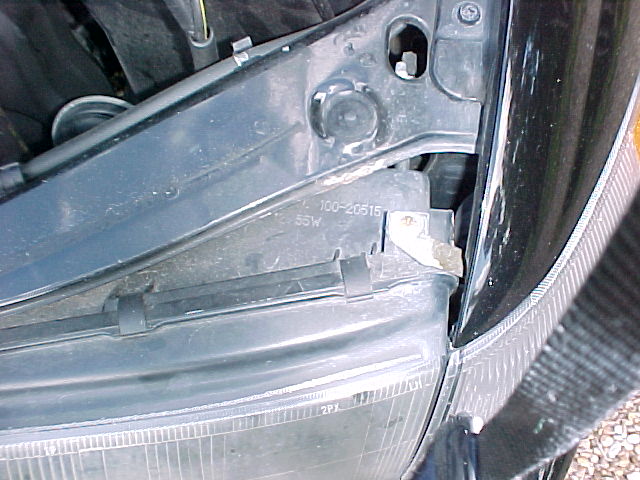
You can now remove the corner lights by pulling them straight forward. I found that if you wiggle the headlight a little first it is easier. Not too much. The outside of the headlight is still bolted. After removing the corner lights you can see that each headlamp is retained on the outer edge by two more 10 mm bolts. remove them.
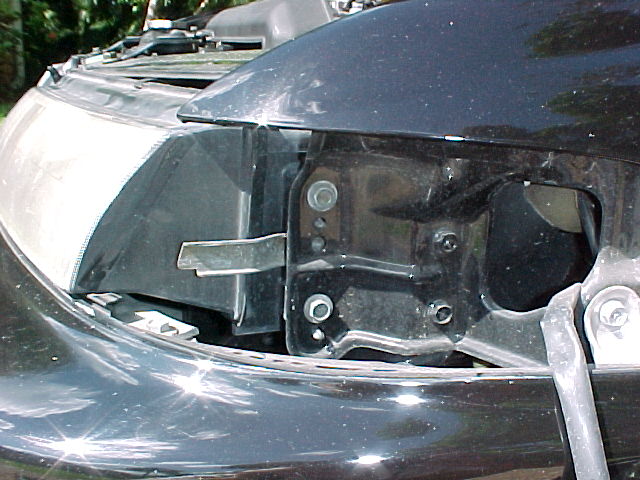
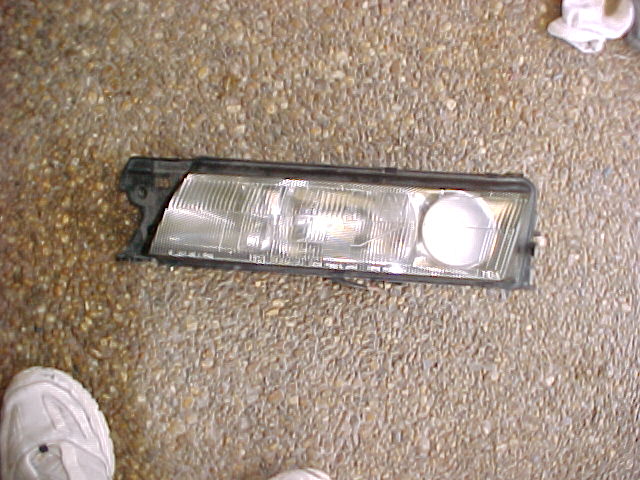
Now you can pull your headlamps forward, unplug the wiring harness from the bulbs, and remove the entier headlight housing without ever fooling with any of the alignment adjustments.
Ready to polish? Don't worry it's VERY easy. You just need to be brave. The first step is to use a surface prep grade steel wool that will quickly cut into the plastic and remove all the hazed, yellowed, sun dammaged material. That grade is, you guessed it, #2. Use straight stroked back and forth accross the length of the lense. Apply just a just a little pressure at this stage. You will find it only takes a minute or two to remove all of that nasty damaged material. What you are left with is a clean white/clear scratched up looking lense just like this:

Now we repeat the process with the #00 grade steel wool. This is the steel wool wood finishers commonly use between coats of paint etc to buff out any imperfections in fancy finishes. In our case it will remove all the scratches from the #2 grade steel wool and replace them with a whole lot more much smaller scratches. Use the same back and forth motion with a modicrum of pressure. Again you will find it only takes a minute or two and comes out nicely like so:
I'm guessin you already got the idea here but we'll cover it all in detail just because us svx people are like that. We now repeat the process with #0000 grade steel wool. This is a fine final finish grade steel wool. It's probably the finest grade your hardware store carries though there is finer made. You'll find that at your local harley davidson store but we don't need it. With the #0000 grade steel wool we use a slightly different technique. You use the same stokes accross the leng of the lense polishing back and forth but now you start with a good amount of pressure. As you progress you steadily start using less and less pressure. Once again the whole process should only take about 1 or 2 minutes for each lense. Now you are probably starting to get excited because your lenses are starting to look clear again and you see those long forgotten projector beams peaking out at you.
Ok. It's time to break out that stuff we all love so much. Car polish. The real stuff. Not the other 49 bottles on the shelf of the auto parts store that say polish but Meguiars. I like the professional #7. They call it their "show car polish" and I can understand why. It's a fine product obviously made just for the fine svx automobile. Shake the bottle and put a nickle sized dollup on a peice of terry cloth (sock turned inside out or hand towel). Now go crazy and enjoy polishing. You'll see results immediately but i suggest you keep at it for say 5 minutes. There's no such thing as too shiny and you don't want to be fooled by that instant shine and clearness you get from geting the lense wet. Ready? Here's what you get.
Aren't projector beams cool?
Want to see my pretty car with it's nice clean lights?
